Thursday, August 21, 2008

Chapter 10 - Canard construction - Part 5

Today I installed the bottom canard spar cap layups. A mostly harmless process, however, again it took nearly twice what the plans called for.

I nearly overfilled the spar cap trough. After finishing and sitting down to rest with a cold beverage, I started to concern myself with it, so against better advise I got up and started messing with it. Actually I am glad I did. I used the bottom contour template as a sort of squeegee and forced any excess epoxy to the ends of the spar caps, they were a little low anyhow. So in the end all is well. I will try and be a little more carefully with future spar caps to ensure they are not over filled. I can image the difficulty in sanding down the cured cap without damaging the adjacent foam.

Here is a close up of the unidirectional spar cap tape. If you look closely you can see a red thread. That thread is easily pulled out, even at the full length of the spar. After removal of the thread, the crossing glass fibers can be pulled out leaving only the heavy unidirectional glass along the length of the spar.
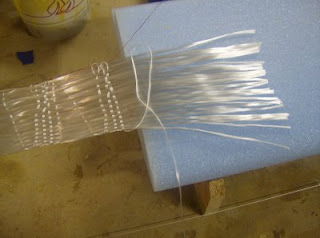

Here is a hight tech caveman tape dispenser I made. Also if you look close you can see the little 3" squeege I made. I epoxied the trimmed down subway bonus card into a block of wood so I could handle it better with epoxy soaked gloves. It worked out great and was free!.


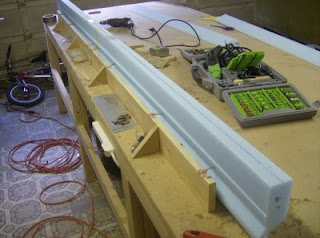
The bottom contour template. This worked great as a final squeegee to ensure the spar cap was flush with the remainder of the airfoil. Because I probable used a little too much glass and epoxy there is some minor contamination to the foam. Probably trivial when compared to an overfilled spar cap.


Spar cap complete and peel plied.

Thursday, August 14, 2008

Chapter 10 - Canard construction - Part 4

Not much to say here, however there is visual progress, so I will post this update. The day before yesterday I bonded the leading edge cores to the shear web. Yesterday I layed out the 9 plywood jigs to the workbench and today I bonded the end cores in place. All cores are aloso bonded to the jigs with small dabs of 5 min epoxy. Everything lines up perfectly and I will probably not have to do any sanding due the the accuracy of the Eureka cores.


Tuesday, August 12, 2008

Chapter 10 - Canard construction - Part 3

Last Sunday I spent a few hours laying up the shear web of the canard. At first I used gray duct tape to mask everything but the shear web area, however as I started to lay up the first few plies the tape fell off. I tried to replace it but it just became a real hassle. I ended up dispensing with it altogether. If I were to do this again I would try masking tape perhaps. In the end a few drips of epoxy got on the foam, not a big deal though.

Everything else went smoothly and as the plans instructed, except, it again took about twice as long as the plans called for. Either I am slow, or Burt and Mike had assistance while doing these tasks.

The dowels in the picture are for aligning the leading edge cores, which will be bonded in place tonight after I finish some minor trimming required due to the lift tab thickness.


Here is a close up of the lift tabs. As you can see I have alodined them. A two part process that involves first cleaning them with an acidic wash and then dipping them in alodine, chemical that protects the parts from corrosions and preps them for primer.

Saturday, August 9, 2008

Chapter 10 - Canard construction - Part 2

While I have been waiting for the canard cores from Eureka I have been fabricating some of the hardware and working on the jigs. Pictured are the nut plates, lift tabs and hinges. I have drilled out the rivets in the nut plates because I have decided to use alodine on all the parts before assembly.


Today the Eureka cores arrive, however to rain on my parade a little, as I was opening the box I discoverd a nasty gash in the box. I suppose some people just can't understand "handle with care".


Here are the ailerons. One of them had one corner smashed off.


Fortunately the peice was easy enough to glue in place. Not as big a deal as I first feared.


The cores are really nice. I am glad I ordered these instead of messing around with a hot wire saw. I also was able to compare them to prints of my CAD drawings of the cannard and they are almost an exact match.


Here the inner aft cores are jigged up for the shear web.


And here the nut plates are recessed into the core shear web area. The two inner cores are also bonded together, note the nails bondoed to the jig to keep them stationary while the epoxy/micro cures.