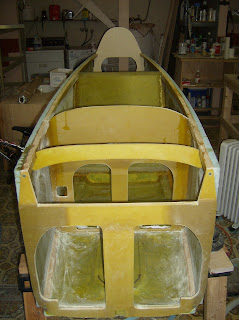
Monday, January 21, 2008

Chapter 6 - Fuselage exterior - Part 3

It's been quite cold lately. A little too cold to be working in the garage. Today it was a little warmer and comfortable enough to do some sanding and mix up some micro to fill in the some little gouges in the foam exterior.

I think that I am ready to glass the exterior and move onto the next chapter, however I would prefer that temperatures are quite a bit warmer than they have been lately. Perhaps I will wait a month to do that.

In the meantime I have ordered the main gear strut from Featherlite. It should be shipping next week. I will post some photos when it arrives.

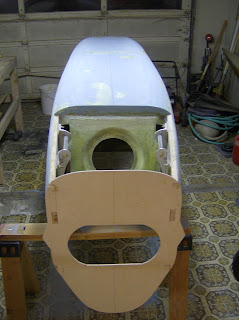


Pictured here is a view of one of the fuel site gauges. I really do not think that this will be an effective fuel gauge due to the amber tint of the glass. I will likely order a pair of Vance gauges.
In addition I would like to install a pair of electronic gauges as well.


Thursday, January 17, 2008

Chapter 6 - Fuselage exterior - Part 2

I am still not quite finished contouring the bottom, but I got bored and decided to flip the fuselage over and do some work on the top. Again this was kind of time consuming, but fun.


Also, just for fun I printed some scale images of some instruments I am considering. It is way early to be thinking about these things in my opinion, but its fun, and that the whole reason I am building this to begin with.

Monday, January 14, 2008

Chapter 6 - Fuselage exterior - Part 1


I have started contouring the fuselage exterior. The plans say this step should take only 3 hours. I think that is quite a strech, but perhaps I am just being timid in removing the foam. Still this has been pretty fun. It's nice to see the box shape transformed to an aircraft exterior.

Chapter 6 - Fuselage bottom - Part 4

I have finally finished chapter 6!

There are a couple of things that did not quite go as planned though.With the cold weather I anticipated the epoxy would cure a little slower than expected. the plans call for a 2" piece of glass from the bottom lap over onto the rear seat back. The glass cured to much and did not lay flat on the underside of the seat back. After the final cure of the tapes and rear seat back layup I sanded off the extra 2". I will lay up a couple plies of reenforcement glass in it's place. While I am not happy with this step not going as planned I am sure the final result will be o.k.

Also pictured, the transition from the front seat back to the fuselage bottom had a small gap. Somehow I carved away a little to much foam when I contoured the fuselage bottom. To remedy the situation I epoxied some foam into the gap and carved it down to a nice transition. Again I was not happy that this happend, but I believe the final result will work well.


Tuesday, January 1, 2008

Chapter 6 - Fuselage bottom - Part 3


Today I glassed the fuselage bottom. Nothing interesting here. It was a lot like glassing the sides.
Tomorrow I will flox the bottom in place.